JJ Abrams Tricorder
006
RE-ASSEMBLING THE
TRICORDER
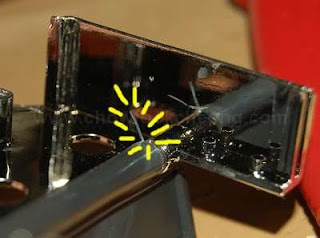
With the soldering all done and the
circuit working, its now time to put things back together. As I have taken the
chrome part out of the front half of the toy, its not time to put them back
again. It took me longer than I expect due to some technical issues. But nothing
to worry about. As for the destroyed fourth screw pillar, the two halves
have no problem when it was being joined. The three remaining screws did a good
job.
 |
 |
|
|
Before you can mount the chrome part, you must
align the short pin from the flap's spring into the hole or else the flap
will not flip out by itself. And opening the shell again is not a good
idea anymore.
|
You really need a sharp hook/screwdriver to do
this. Just push the chrome part as close to the Tricorder shell as
possible and then use the screwdriver to position the pin into the
hole.
|
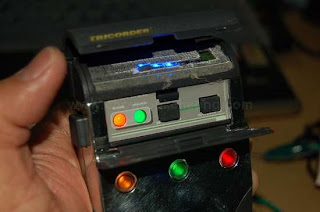
Final check (OK, so its the same picture) And
everything works perfectly. I was tempted to pour a bit of WD40 onto the
two flap's joints as they felt a bit stiff after the
modification.
|
COMPLETING THE DISPLAY
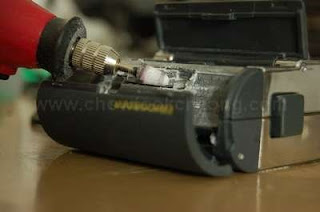
So, after testing the circuit for the
final time, I have closed the two shells. And now, before I can put the sticker
in, I have to grind the excess LED. Right now, I am having second thoughts about
the sticker and I should do my own but its too late and too expensive to do that
at this stage.
 |
 |
 |
|
Using a grinder bit, I have more or less
removed much of the extra LED portion. In my excitement, I forgot to lay
some newspaper underneath and so, I had to clean up the mess before my
Wife sees it.
|
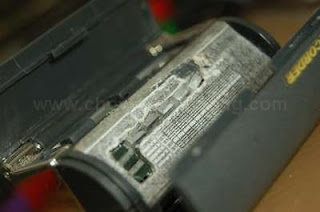
Yeah, the grinder not only removed the LEDs but
it also made them all crooked. Its OK because the original sticker will
cover up this careless mistake. I should be a vacuum cleaner because I
suck at everything.
|
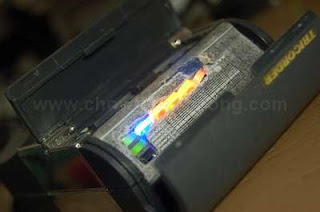
One final test with the LEDs. Yes, they're
working but a few LEDs are no lighting up properly and I do not dare to
open it up anymore. Maybe one day, I might as the green LED on the left is
not lighting up.
|
 |
 |
| Since the last LED has that diffused look
after it was grinded, I used the grinder to make the rest of the LEDs to
have that diffused look as well. |
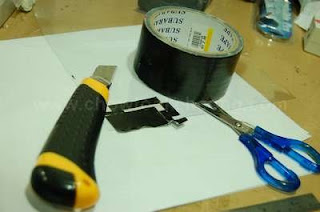
For the sticker, I used a cloth tape, cut it
to size and stuck in underneath the acetate holding the sticker. Then, I
cut the thin double-sided tape and used them to bond between
the acetate and the toy Tricorder's display
area. |
So, how are wee feeling right now?
Excited? The moment you stick the sticker back into the Tricorder and then close
the flap, and then open it again for the first time, is very exciting. Because
if you have done everything right for the last five pages, this is the end
result. And so, onwards to the last page......


